What Should You Know About House Laminate Flooring

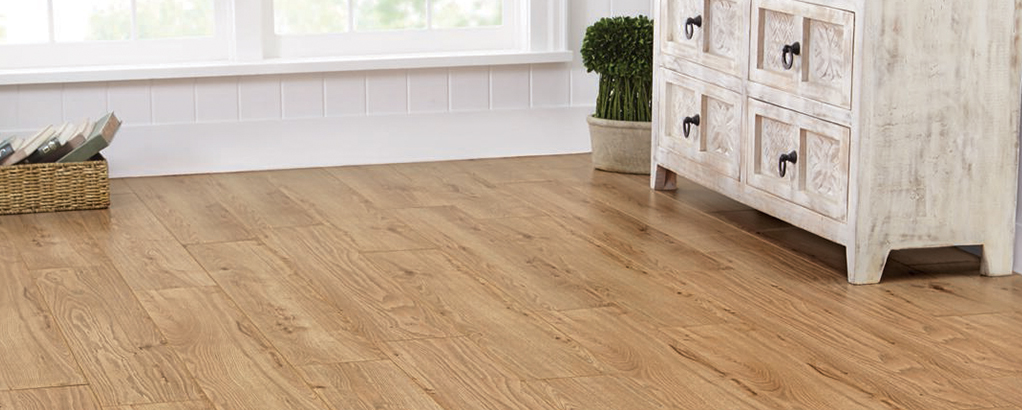
Laminate Flooring – Everything you need to know

If you’re planning to update the floors in your home, laminate flooring can be an excellent choice. This durable flooring comes in a wide variety of colors, styles, and quality levels. Before you take the plunge and remodel your home, it’s important to know more about this type of flooring so you can decide if it’s right for you. From style and brand names to the pros and cons, read on to discover everything you need to know about laminate flooring.

The Pros & Cons of Laminate Flooring

As with any home project or finish, there are several benefits and drawbacks to installing laminate flooring in your home. Let’s take a closer look at some of the pros and cons to give you a clearer idea of whether laminate flooring is right for you.

PROS

  • Laminate comes in planks or tiles, which makes it easy to recreate your desired look.
  • Laminate flooring is easy to install with edges and ends that snap together. No nails are required which means you can install laminate flooring yourself as an easy DIY upgrade.
  • The thin foam cushion underlayment makes laminate quiet and comfortable to walk on.
  • No trees are used to manufacture laminate flooring, which means it’s a good option if you’re concerned about issues like deforestation and sustainability.
  • No VOCs (volatile organic compounds) are released from laminate since there is no need to use glue or other adhesives.
  • Laminate is exceptionally durable, making it a prime choice for busy households. It’s also very easy to keep clean with regular sweeping and occasional mopping.

CONS

  • While laminate flooring is affordable, it’s not usually the prime choice for homebuyers, who typically prefer hardwood or tile.
  • Laminate is vulnerable to moisture damage so it should not be installed in basements or areas where a lot of moisture is present.
  • If you want to install laminate in the bathroom, all of the edges must be glued, and the perimeter must be sealed with caulk at installation.
  • If you’re concerned about the environment, the protective wear layer on laminate is not biodegradable.

How is Laminate Flooring Made?

Laminate Flooring is made up of 4 separate layers with the main component being a HDF core ( high-density wood fibre) . HDF is made from compressed wood fibres extracted from wood chips. Depending on the quality of the floor, the HDF core will vary in a few common ways:

  • Resistance to Moisture
  • Thickness
  • Density

Extra moisture resistance in a laminate floors core can be very welcome in rooms such as kitchens and bathrooms. Waterproof laminate can also be helpful when there are pets around.

A thicker HDF core board will often provide a stronger more robust floor.

Increased density in the HDF will give enhanced protection against chips and premature wear.

Each large and uncut HDF sheet is finished with a balancing paper on the underside. This important base layer protects the laminate from warping or swelling easily by adding extra protection from moisture. Some cheaper laminate floors won’t have this feature, but it is something that we insist on for all for our laminates at Wood Floor Warehouse.

Decor Papers

On the top side, the HDF floor panel is finished with a decorative paper. While these are just paper-based, the decorative prints will differ, displaying a range of colours and patterns. It’s this decorative paper that will give the final colour and pattern to your finished laminate floor. Because the decorative papers can be printed with any design, there are tens of thousands of laminate flooring decors available across the world.

Wear Rating

The surface layer of all laminated flooring is the clear lamination sheet. It can vary in strength and so is commonly rated by Abrasion Class or AC for short.  Abrasion Ratings will range from 1-6 with the highest offering the toughest surface which can be used for heavy commercial use. It is identified as an AC5 floor (abrasion class 5), with an infographic which depicts a commercial building and 3 people beside it. Accreditation for laminate flooring can be awarded by the EPLF , an independent organisation who test laminate flooring and award industry-standard ratings.

Embossment

After the construction of each layer is completed, the large laminated floorboard is often embossed to provide a textured surface and enhanced resistance to slipping. In a top-rated board, the embossed texture will often follow the pattern of the decorative paper underneath, resulting in a more realistic looking and feeling floor. For example, the embossment may follow the lines of the wood grain on the decorative print below.

The cutting stage can now begin. The large, finished HDF sheets are sliced down to the required size. A common size is 200mm wide and 1200mm long planks.  This size can be easily handled by the end-user. As technology has improved, the range of sizes available has also increased. Long and wide plank laminate flooring and large tile effect laminates are becoming more and more popular. Planks are machined to add a click profile to the long and short end of the board. Often a beveled edge (or V-groove) will be added to the top side of the laminate floor at this stage.

Packaging

Finally, the individual planks are packed into open-top cardboard boxes. These are then sealed with a breathable plastic wrapping to offer protection from moisture. After being stacked on a pallet the floor can then begin its journey to a distributor or sometimes even directly to the end retailer. We always buy directly from factories across the world to enable us to achieve competitive pricing and large stock levels.

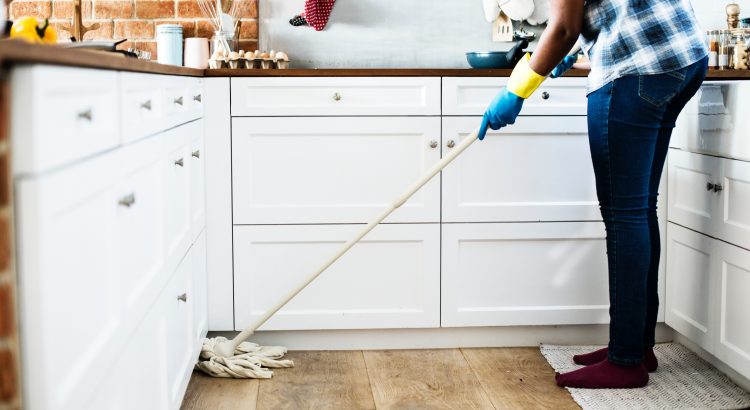
How Do I Get My Laminate Floors to Shine?

Cleaning your laminate floor with the right and laminate floor cleaner solution will go along way in keeping them shiny. Don’t be tempted to apply wax and polish on laminate to make it shiny and get rid of a dull look.

Here are ways to fix dull laminate floors

1. Vacuum or Dust Mop Your Floor

Dirt and dust particles are best removed from your laminate floor as soon as possible because they can make laminate countertops and floors dull when they leave streaks and residue buildup.

Since this type of floor is meant to be shiny, dust can leave scratch marks on the shiny laminate surface. The best way to get rid of dust is to first use the best vacuum cleaner or mop specified for wood floors.

Its good to avoid any vacuum machine with a roller brush because they can scratch and damage your flooring. You can just use a soft broom to get rid of dirt and dust particles.

2. Use the right laminate cleaners

Using cleaners that are too harsh and aggressive can damage your laminate floor and make it dull. To get rid of the dull appearance and make your laminate floor shine, use a good laminate cleaner

Keep in mind that an expensive cleaning solution doesn’t guarantee to leave a shinier floor. Select those meant for laminate floor especially commercial products.

3. Clean your floor to remove residues

Buildup of residues from bad cleaning materials and dirt are possible reasons for a dull laminate floor. You might want to clean the dirt off to get the laminate floor to shine again.

Damp-mop your floor using water or a cleaning mixture as minimally as possible. A sprayer is a good option – so spray a section at a time as you clean it before going to the next part.

Do not steam clean your laminate floor as steam is too hot and will strip away the shiny finish on your laminate floor.

You can wring your cleaning towel, piece of cloth, or even traditional mop to get rid of excess water and just leave it a little damp. Allow it to air dry.

4. Polish Your Floor

Use a dry cleaning cloth or microfiber cleaning cloth to buff your floor dry. Buff a section at a time before going to the next section to leave a nice shine on your laminate floor. Bluffing help restores and rejuvenates the laminate shine.

Cleaning Laminate Floors

It’s always important to refer to the manufacturer’s notes regarding which cleaning products should be used on your laminate. Other than that, a simple soft broom and a mop will be the only tools you’ll need to keep it looking as good as new.

There are other simple things that you can use to help with the day-to-day maintenance and keeping the floor clean.

The best cleaning products

  • A doormat will help keep dirt outside rather than being walked into your home.
  • The most important thing to consider when keeping your laminate flooring clean is that it is not waterproof.
  • You can clean most laminate flooring with a solution of vinegar and water – mix one cup of household vinegar with one gallon of warm water. Use a slightly damp mop, ensuring you don’t over wet the floor – water can cause water spots or warping on laminate flooring.

What to do about spills and dirt

  • Don’t use a soaking wet mop on laminate; if water soaks through it can seep into and under the layers causing warping.
  • Any spills should be dealt with using a damp cloth and the residue wiped up with a dry cloth immediately.
  • Keep the floors dirt and dust free by regularly sweeping with a soft broom or vacuuming with a hard floor attachment. A dry microfibre mop or cloth can be used to remove and collect loose dirt and dust.

What to do for an intensive clean

  • For a more intensive clean, use a well-wrung microfibre mop or floor cloth with specialist cleaning fluid, ensuring the residue is dried up afterwards.
  • It is not recommended that floors with bevelled edges or V grooves are ever cleaned with a damp cloth or mop. This could cause dirt to accumulate in the grooves which could prove difficult to remove.
  • Sometimes there are instances when substances like candle wax or chewing gum stick to laminate. In those instances, use ice to harden it and then scrape off with a plastic scraper. Wipe clean after with a lightly damp cloth.

How to Maintain Laminate Flooring

Keeping your flooring in pristine condition might seem like a challenge, but it doesn’t have to be. Laminate flooring is a relatively low-maintenance flooring choice. There are a number of ways to maintain laminate flooring, without strenuous cleaning.

To maintain your laminate flooring, you need to:

  • Take steps to prevent dirt and damage in the first place
  • Clean up spills immediately
  • Regularly sweep the surface of your laminate
  • Use a flat-headed spray mop for a more thorough clean
  • Make repairs if needed

Wedding Videographer Tips For Capturing The Important Moments

Find a Videographer: Questions to Ask Potential Wedding Videographers

You want to make sure your wedding day is captured perfectly. When you start the process to find a videographer for your wedding, ask these questions.

ARE YOU AVAILABLE FOR OUR WEDDING DATE?

This may seem like an obvious question, but it’s the first thing you should ask a potential videographer. Popular wedding videographers are booked months ahead of time.

Start looking for a videographer early in your planning process. Once you set your date it’s a good time to begin your search. Especially if you have a particular videographer you really want to work with.

WHAT EXPERIENCE DO YOUR HAVE IN WEDDING VIDEOGRAPHY?

Experience is an undeniable quality you look for in your wedding videographer. Weddings are large, intricate events that fly by in a flash. You need a videographer that knows how to perfectly capture this hectic, incredible day.

Ask your potential videographers how much experience they have filming weddings or other large, live events. Videographers with wedding experience will know the ins and outs of capturing your day in all its glory.

HOW WOULD YOU DESCRIBE YOUR VIDEOGRAPHY STYLE?

Every videographer is an artist with their own distinctive style of filmmaking. You want to make sure that you hire a videographer that matches your personal style and preferences. Take a look at their online portfolio and see if they have videos that match the vibe you’re trying to capture on your big day.

There are several trends in wedding videography that can help you narrow down potential videographers by style.

Cinematic Videography

This style of videography uses angles, filters, and transitions inspired by feature film making.

This style is less concerned with linear storytelling, and more focused on capturing the overall feeling of your day. This style employs plenty of aerial shots captured with drones, slow motion, and voice-overs.

Storytelling Videography

Another popular style is storytelling videography. This style focuses on capturing the entire story of your special day and the love that brought you there.

This style prioritizes intimate moments over aesthetics. Storytelling videography also uses a lot of the same camera angles and filters as cinematic videography. Storytelling style relies heavily on voice-overs and music to tell the story of the couple on their special day.

Documentary Style

Documentary style wedding videos are less polished than cinematic style ones. However, this creates a more authentic and unstaged final product.

Videographers who specialize in this style of filmmaking seek to capture a special event as it happened. They don’t use any staged footage or shots. Instead, they rely on the magic of your wedding day to organically create beautiful moments.

Many documentary wedding videographers also employ certain storytelling aspects as well. However, whatever voice overs they use will come from unscripted moments at the wedding.

When Will I Get My Final Video?

Timing is everything. The hardest critique a wedding videographer receives is how long it takes them to get your video to you. The most enjoyable part of wedding videography is getting to spend the entire day with a couple; being creative, having fun and getting those amazing moments on camera! The most tedious part of the job is editing; it is a hard and long process and there is no easy way around that

What If I Don’t Like My Video?

The horror stories are out there! Ask around and you will hear from brides who were not happy with how their wedding video was edited and how the videographer was no longer reachable to help with any changes. Ideally, this will not happen to you, but never negate the possibility. Your videographer should always be available to you. It’s amazing how easy they are to reach when you want to pay them, but when you need a few changes, they are on an extended vacation to Bermuda!

What Is Your Emergency Plan If You Can’t Be At My Wedding?

Crazy things can happen and an experienced videographer knows this! A seasoned professional will have a backup plan in place in case they have an emergency and can’t be at your wedding. Have them outline this plan to you. Ask them if you will receive a refund if the unfortunate should happen.

What does your package include?

Obviously you’ll need to ask your potential videographer for packages and prices – go for the best you can afford on your budget. But do set aside a decent budget for video, because besides the photos, it is the only thing you will have to remember and commemorate this massive day. When enquiring about price, be sure to ask what exactly is and isn’t included in the package and what the videographers terms are. For example, how long will the final cut be? What music will be included (and who will choose it)? How long will it take for the video to be edited? (Bear in mind that the editing process is extremely time-consuming. It can take an experienced videographer anything from 45-80 hours to complete a wedding video and that is usually before final checks and re-editing begin.)

Do you know or have you ever worked with my photographer before?

Make sure you match your videographer and photographer well. For example, if your photographer uses a lot of flash it can really ruin a natural-style video. While it’s not absolutely necessary that they’ve worked together before, a prior relationship is helpful, or at least ask them to co-ordinate ahead of time how things will work on the day with both parties, so that you get the best photos and video possible.

Who will be shooting my wedding?

Ask for the name and details of the videographer who will actually be shooting your wedding day and be sure to make a call or organise a meeting or Skype session to get to know them a bit better beforehand, so everyone is comfortable and knows what to expect on the big day.

BONUS TIP

DO ask your guests not to film or take photos! This is your day, and you have paid a lot for professional photos/video. Having guests in the way with their cameras or phones out looks terrible on film and can make the professionals’ job really difficult. Remember: they came to attend your wedding, not document it!

Things you can’t forget to ask your wedding videographer

If you’re getting married soon and have video on the mind, that’s great! Wedding videographers are fantastic because they have the ability to capture your wedding in a whole different way than your photographer will. It adds an entirely new element to documenting your big day.

Let’s assume you’ve already done your research and found a wedding videographer whose work and style you love, and who has glowing reviews. Even after that (which is in itself quite a bit of work), there are still some things that you will need to discuss with him or her in order to ensure you’ll be happy with both their part in the wedding day and the delivered product.

Here’s what you should discuss with your chosen wedding videographer before making the decision to book them.

Highlight Or Feature

Typically, wedding videographers will offer couples either a “highlight film” or a “feature film”. It’s very, very important to understand the difference between these two options.

A highlight wedding film is just what it sounds like: a little video of the highlights of your wedding and reception. These are typically around five minutes long, and these are the types of videos that you’ll post to social media or email your family members. This video will only include snippets of the day, and not full segments, such as the vows or the entire first dance.

A wedding feature is usually around 20-30 minutes, and is more in-depth. This is the film that you’ll watch on anniversaries, with your parents, with your kids, etc. This documents more, and often includes the entire wedding ceremony.

Be sure to make a decision on which of these two types of wedding films you prefer and discuss this with your wedding videographer so that you’re on the same page.

Obtrusiveness

No matter how great your wedding videographer’s work may be, you don’t want him or her to get in the way of your guests (or you) and ruin the experience. Some videographers are completely unaware of how obtrusive they are.

You want someone who knows how to stay out of the photographer’s way, who won’t be thisclose to the guests, and who is almost hidden.

Professionals tend to capture the more intimate, quiet moments (such as getting ready before the ceremony) close up, and then will change their lenses later to capture moments from farther away, such as the dancing during the reception.

A good wedding videographer knows to keep their equipment hidden (no tripods in the hallway!), not be distracting, and to be as unseen as possible. Make sure to ask the person you’re considering how they maneuver.

The Music

Music is something that many couples completely do not discuss with their wedding videographer, and then they regret it when they see their video. After all, music can make or break a film.

If you have certain music in mind for your wedding video (and many couples do), ask the wedding videographer if he or she will allow you to use it. If they say no, well, that’s very weird and you should think about finding someone else.

If you don’t have a preference, be sure to ask them what music they will probably use. If you don’t like it, that is very important. Ask if they have music you can choose from, or what their process for selection is.

Whatever needs to happen in order for you to know what music will be used, make sure it happens before the wedding videographer edit the video. Otherwise you may be unhappy with the vibe of the film.

Delivery Date

Sometimes great work takes time, but you don’t want to be waiting for your wedding video for six months. It can take especially long if you’re getting married during wedding season (late spring through early fall).

Be sure to discuss with your wedding videographer what their typical turnaround time is, and make sure you’re comfortable with their answer.

The Best Local Moving Companies Have Solid Consumer Reviews

When To Start Packing For A Move

Packing your home for your move is no easy task. As a professional in the moving industry, being involved in hundreds of moves, I can tell you the most important part of the moving process is how you prepare and when you start.

When should you start packing for your move? You should start packing for your move at least 3 weeks prior to your anticipated move date. The actual moving preparation process should start at least 6-8 weeks before your move. The earlier you start the packing process, the easier it will be when your move date approaches.

3 Most Crucial Packing Tips For Moving

Gather your valuable items – Don’t let the movers move your small valuable items like jewelry, cash, checkbooks etc. In fact, movers specifically don’t want to move your high-value items because they don’t want to be held responsible if items get lost during the hectic moving process.

Pack a day box – This may include any medications, toiletries, clothes, airline tickets if moving long-distance, and anything else you may need on a daily basis. You may need several of these boxes, but the purpose is to not lose anything you need on a daily basis in the depths of random moving boxes.

Give yourself enough time – It’s not until you start packing and moving your home you realize how much stuff you actually have. Be sure to give yourself enough time in advance to pack for your move.

6-8 Weeks: Clean & Decide What You’re Taking With You

Do a brief clean of your house – A clean house will be easier to start with when deciding what belongings you will be taking with you to your new home.

Go through each room and decide what items you will be purging – Having fewer things to move will make your move cost cheaper and will help you stay organized throughout the moving process.

Separate the items that you don’t want and put them all together – Getting the clutter out of the way will give your mover an idea of how much stuff you will be taking with you to your new home and they will be able to give you an appropriate estimated cost for your move.

5 Weeks: Get Rid and/or Sell Items You’re Not Taking With You

Sell your unwanted belongings – Selling unwanted belongings is a great way to save money when preparing for a move. Your move cost will be cheaper since you will have fewer things to transport and you will receive cash for your unwanted items. Here’s how you can have a successful garage sale before you move.

Donate any items that are not worth selling – If you have any items that are not worth selling, consider donating them. When donating your unwanted items, ask for a receipt so you can write-off your donation when you file for taxes.

What will you do with your unwanted old funiture? Getting rid of your old furniture is no wasy task. Check out this simple guide to getting rid of your old furniture.

4 Weeks: Pick An Option For Moving Your Goods

Full Service Moving Company Option

Get at least 3 quotes from moving companies – It is always best to check the market before you decide to commit to your moving company, especially if you are looking to save money. Call a few companies in your area to get an idea of how much your move will cost.

Research reputations online – When moving, everyone wants to feel comfortable that their personal belongings are in good hands. Search prospective moving companies in your area on review platforms such as Yelp or Google.

Request an in-home estimate for larger homes – In-home estimates are recommended for larger homes because they will give you a better idea of how much your move is going to cost. Since most movers charge by the hour, this is the most accurate way for the companies’ salesperson to give you an appropriate quote.

Check licensing – Licensing assures that the moving company is following the rules and regulations of the industry and will protect your goods from damage.

Ask for referrals from friends, family, or realtor’s – There is nothing better than getting a great referral by somebody you can trust. Ask family and friends if they have used a trustworthy moving company in the past that they can recommend to you.

Moving Guide

would like to help make your move less stressful by providing you with moving suggestions and tips. Organizing and preparing weeks ahead of your move ensures a successful re-location and dramatically reduces mistakes and stress.

6-8 Weeks Before Moving – Clean Out, Hire Movers and Pay Attention to Detail

Begin choosing which items will be moving with you, which will be placed in storage and which you can do without! Also consider which items you would like to move yourself, and which can be trusted with the movers. If you don’t have a moving company in mind, get references and take bids from several different companies. Check your local listings such as Yelp! and Google for local moving companies.

Many moving expenses are tax-deductible, so maintain a file with important information and receipts for moving related expenses. If moving to a new community, find out about the schools, parks, recreation, and community programs from the local Chamber of Commerce or Visitor’s Bureau. Transfer medical, property, fire and auto insurance through your insurance agent.

4-5 Weeks Before Moving – Gather Supplies, Register Community Changes and Set Up Utilities

If you are planning to do some part of the packing, start collecting moving and packing supplies. These can be purchased from our supply shop. Contact the post office and fill out a US postal change of address form and provide your new address to your utility companies, internet, phone and cable companies.

2-4 Weeks Before Moving – Begin Packing and Disposing Items

You may NOT want to pack your valuables in the moving vehicle; consider taking them with you. Plants – some state laws do not allow moving house plants across borders so prepare for this ahead of time. Depending on the length of your move, if you are going to travel by car, you may want to get the automobile serviced prior to your departure.

Moving guide

So, you have decided to move? That is a great idea! When you move Whether you are moving for work or school, you will most probably have a hard time during the moving process. But do not worry, because this is normal. A move is very stressful and will take you to your wit’s end. There are so many things you need to think about and so many things to worry about.

complete the whole packing process and later unpack when you get there, and so on. That is why we are here. We want to help you finish the moving process without much hassle. There will, of course, be a lot of work, but with these tips moving to Maspeth will be a lot easier! So, without any further ado, let’s dive in!

WHAT’S TO KNOW?

As we have already mentioned, when moving there are a lot of things you need to take care of. You need to get a house or apartment, you need to find a reliable moving company, you need to pack all of your stuff and create a moving checklist. We will now go in-depth about all of these things. So let’s get to it!

MAKING PROPER ORGANIZATION

When you are moving, you need to be properly organized. Proper organization is vital to everything in life, so why should it not apply to moving as well? Well, it does, and that is why you need to pay attention to that. The best way to create proper organization is to create a moving checklist. A moving checklist should contain everything you plan on doing during your move. From the beginning to the end. From deciding to move to unpacking and unwinding in your new home

HIRING A RELIABLE MOVING COMPANY

This should be the next step on your moving checklist, after deciding to move. A very important aspect of the move is a good reliable company. It is no use hiring a moving company that is not going to do everything the way you want it to be done. Reliable moving companies are very often flexible and will try to adapt to the style of the move you want, and that is why you need to do your research before hiring the first one that comes up. How to do that kind of research, you ask? Well, it is not that hard, you just need perseverance! The first thing you can do when looking for a reliable moving company is to ask your friends or family if they know any. If they don’t, worry not! There are still ways to do so! The next step you can do is asking a neighbor that had recently moved in. However, these may be the easy ways of finding a moving company, but that does not mean that you will find what you need

Moving Checklist

What You Need to Know, 12 Months Before You Go.

There’s only one way to stop feeling overwhelmed and silence any thoughts of self-doubt. It’s time to get organized!

I will also send you a short series of emails to help you jumpstart your move as well as regular updates. Yes, you can unsubscribe at any time.

After only a few months of blogging, my inbox was overflowing with questions about how we moved to Australia. The more I wrote, the more questions I got until I wasn’t able to keep up.

My goal is to create a single resource where you can find answers to all your questions and have access to a community of expats, both moving and currently living in, for recommendations on everything from international shipping companies to where to live

Sorting Out Your Finance Before Moving

When we moved to Australia, we made several very costly mistakes with our finances from choosing a bank to transferring money.

Yes, this is going to take some time and a lot of patience. As for the cost of moving, you won’t have to pay for everything at once so you can start budgeting for your move now.

THE ULTIMATE HOUSE MOVING GUIDE

What to Do When You Move?

You need to formulate a detailed plan and include the following steps: Research, Preparation and Execution. The first one covers your basics: formulating a budget, finding a moving company, talking to your family and friends, and packing materials. Second, pack your belongings, deal with the utilities and the change of address. And the third step covers the transportation of your items and the arrival at the new place.

How Do House Removals Work?

House removal is the act of moving one’s belongings to one place of living to another. It can be done with or without the help of professional movers. There are different ways of packing, transporting and storing. Depending on where the person is relocated, the process can last from start to finish from a couple of days to 3 to 4 months for international removals.

How to Make Moving Easier?

Plan and organise every step of the process. Use a checklist, so you won’t forget anything important. Bookmark this house moving guide and use the amazing resources we provide you with

What Are the Biggest Difficulties When Relocating?

House removals are difficult for a variety of reasons, and not all of them are related to money. Let’s explore deeper what are the most frequent obstacles you need to overcome when moving and what changes you may expect.

Missing Some of Your Utilities

Most places you move to will have heat and running water but you may end up without internet and satellite. If you are fortunate, you can still use your smartphone but even so, it’s a large nuisance. You have to search for good providers, arrange a date for the technicians to come and the process can last sometimes up to two weeks. So don’t forget to start the research earlier and schedule the installation in advance.

How To Find The Best Divorce Lawyer

Questions to Ask a Divorce Lawyer Before Hiring

Looking for divorce attorneys and wondering what types of questions you should ask before hiring someone?

1. Does your law firm routinely handle divorce matters?

Make sure the lawyer you choose is experienced in family law, including divorce. Ask: When did you start practicing family law? How many divorce cases have you handled? Are you a certified specialist?

2. What is your fee structure?

Do you require a retainer/deposit? What is your hourly rate? Will you have other staff members work on my case? If so, what is their hourly rate? How do you bill for the time you spend on the case? Does time spent answering my questions count as billable time? How will you communicate with me about the fees? Will there be other costs involved in my case?

Getting a divorce can be expensive so make sure you know what you are being billed for.

3. How long will my divorce take?

What is your law firm’s strategy for my divorce case? What can we do to move things forward smoothly?  How long will my divorce take? What if the other spouse tries to drag things out? According to Nolo, “Cases that went to trial on any issue took an average of 17.6 months to resolve, while the readers who settled their issues were able to resolve their cases in nine months.”

4. What is the divorce process in my State?

There are different divorce procedures you and your lawyer will have to follow depending on what state you live in and the complexity of your case. Getting a divorce requires a major time commitment, so knowing the process and procedures beforehand can help you be more prepared.

5. How Long is Your Average Response Time?

How long does it usually take for your firm to return emails and phone calls? What is the best way to contact you and your staff about day-to-day questions? How can I contact you during an emergency?

6. Will I pay (or receive) spousal maintenance/alimony?

How will you help to determine whether I will owe (or receive) spousal maintenance payments? When would the payments start? How much will I owe (receive)? How long will I pay (receive) the support?

Depending on how long you were married, how much money each of you earns, and other factors, spousal maintenance may be an issue to address in your case.

How do I know I’m choosing the right lawyer?

Selecting a divorce lawyer can be a tricky business: many claim to be ‘top family lawyers’ but can you believe that? If you have children under the age of 18, it is vital you choose a lawyer who is a specialist family practitioner, accustomed to family courts and to dealing with access/care issues. If your case includes discrete issues such as farming businesses or trusts, ensure your lawyer has expertise in these areas. Check that your solicitor has the appropriate level of experience. If you have limited means, avoid senior lawyers, who will be more expensive. A younger lawyer will be cheaper and also be useful in cases where, for example, social media is relevant. You will need to discuss very personal matters in a frank way, so make sure you are comfortable with your lawyer. Many women, for example, find it easier to share details of their personal lives with a female solicitor, who they may find more understanding. A family lawyer at a firm with a wide range of expertise can be beneficial. In particular tax, property and commercial departments often assist.

How much money will my ex have to pay me?

The amount a spouse might have to pay is decided on a case-by-case basis. There is no categorical answer and there is no formula: any payment will be at the discretion of the judge, who will make a decision based on a statute dating back to 1973. They have a very wide leeway to interpret that law. When it comes to capital, a rough-and-ready way of considering it is to look at what is ‘matrimonial’ – whatever is accrued through the marriage. There is no absolute fixed line, and the longer the marriage, the harder this can be to define. This matrimonial capital is divided equally, whereas everything else is kept separate. Then you analyse what your needs are in terms of a house, income and earning power – assuming it is a long marriage with children. You compare the results of both these equations, and you get the higher of these two numbers. In technical terms, this is a ‘sharing claim’ versus a ‘needs claim’.

If there is only enough money in the pot for one home, the partner in need of a house for the children will get the money. The economically stronger partner is sometimes upset by that. There is child maintenance, and sometimes spousal maintenance, to prevent hardship to one party if they earn less than the other. There is the question of whether spousal maintenance should be for a set term, such as until the end of the children’s education, or for life. Term orders are coming into play more often now.

How Can I Avoid Upsetting Or Angering My Spouse?

Divorce is a stressful process for everyone involved. Using a solicitor who knows how to handle sensitive or acrimonious situations can help you and your spouse deal with the divorce in a more positive way. Like many divorce lawyers, Brookman is a member of Resolution, the group of legal professionals that strives to find constructive, non-confrontational solutions to the issues raised by divorce.

How Do I Get A Divorce?

You start by presenting a petition to the court. If the court is satisfied that the marriage has broken down irretrievably it will issue a decree nisi. So long as you or your partner don’t try to establish that the marriage hasn’t broken down, the decree nisi will become a decree absolute after six weeks. The process shouldn’t take more than a few months, however if there are disputes over finances or children, matters will usually take longer to resolve.

Can I Throw My Spouse Out Of The Family Home Before The Divorce Is Final?

It will depend on the circumstances. If the home is jointly owned it may be difficult to exclude your spouse from the property because he or she may retain a right of occupation. And even if the home is owned by you there may be occupation rights because of marriage and the fact that the property was a family home. If your spouse leaves the home voluntarily and subsequently wishes to return he or she may have to apply to court. Different factors will apply where there are allegations of domestic abuse. This is a complicated area and you should ask your solicitor for advice in light of your personal circumstances.

Are there any other attorneys that will be working on my divorce case?

Under what circumstances will other attorneys work on my case? How experienced are they? Am I able to meet with them as well? You should have the opportunity to “meet and greet” anyone who you will be working with during the course of your case.

Are there any out-of-court or peaceful divorce options?

Not everyone wants to battle it out in court. Make sure to ask your lawyer about peaceful divorce options available to you: If my spouse and I agree to the terms of our divorce, or if we think we can reach agreements with some help, what type of divorce would work best for us?

Mediation and collaborative divorce are out-of-court options that can help you and your spouse to end your relationship amicably and in a way that allows you to focus less on the problems in your marriage and more on your family’s future.

Concerning general experience, ask these questions:

  • How many matrimonial cases have you handled?
  • How many of those cases went to trial? (An attorney who has done a lot of trials might not be a good negotiator. Keep that in mind, especially when the lawyer hasn’t been in practice very long.)
  • How many of these cases involved custody, support, business valuations, large financial settlements, or whatever issue feels like your major concern?
  • Where did you go to law school? (Don’t ask if the diploma is staring you in the face.)
  • Are you experienced in unbundled divorce (or collaborative divorce, or whatever style of divorce you hope to enter)?
  • Do you have the time to take on a new case now?
  • Do you know my husband (or wife)?
  • Do you know his or her attorney?
Posted inLegal

A Common Electrical Home Inspections Defect

Electrical permits and inspections

Arrange for electrical wiring permits and inspections from Hydro for:

any new building, renovation or addition;

the installation of any electrical equipment;

any alteration, repair, or extension of any electrical equipment.

Before any electrical work is started, you must have an electrical permit.

To obtain an electrical permit, complete an Electrical Permit Application and submit it to your local Hydro Customer Service Centre. Electrical contractors can submit their applications online through ePermit.

View electrical contractor permit fees.

View electrical codes, standards, and guides.

By law, all electrical wiring in must be inspected to ensure compliance with local bylaws and the Electrical Code. All wiring must be visible for inspection and all electrical equipment must be approved.

Electrical equipment approval

For inquiries about the requirements for electrical equipment approvals

Hydro recognizes a number of Certification Bodies (CBs) and Inspection Bodies (IBs) to provide certification, field approval, and special acceptance services for electrical equipment

Department of Construction & Inspections

Electrical Inspections

In response to COVID-19, the Governor has placed new requirements on construction activity. We will only inspect those projects that meet the Governor’s requirements. See SDCI’s Inspections for instructions on how to request inspections for projects.

What Is It?

Most electrical permits require three inspections: cover, service, and final.

Cover inspection. Schedule this inspection when all new circuits are wired (boxes installed, wires run, grounding conductor connected or made up, nail plates installed in areas as needed). Don’t cover your work with insulation, receptacles, or wall switches until the inspector has approved it. Cover inspections also include underground installations. Don’t cover trenches, ditches, or slabs until the inspector has approved them.

Service and feeder inspection. Schedule this inspection when the service electrical mast, meter base, service panels, grounding electrode conductors, and branch circuits (if possible) have been installed.

Final inspections. Schedule this inspection when the electrical work has been completed. Make sure panel boxes are covered, circuits are labeled in the right spaces on the box, and all cover plates are installed. You must have all of equipment and appliances installed, grounded, and energized for final inspection.

Addressing Inspection Issues

We may not approve your electrical work for a number of reasons, such as:

Your inspector could not get on site

Your work is not complete

There are code violations

Inspection Results

You can find results and notes using our Services Portal. Your inspector will add notes about any failed or partial pass inspection result to your permit information.

Electrical Safety Inspections

These new regulations require landlords to have the electrical installations in their properties inspected at least every 5 years and tested by a person who is qualified and competent. Landlords will also have to provide a copy of the electrical safety report to their tenants as well as to the local authority if requested.

For most landlords in the private rented sector this will not require a change in behaviour. The majority of landlords already check their installations regularly so they can provide the safest homes possible. However to ensure every landlord can comply with these regulations

What the regulations say:

Private landlords must ensure every electrical installation in their residential premises is inspected and tested at intervals of no more than 5 years by a qualified and competent person.

Following the inspection and testing, a private landlord must:

obtain a report from the person conducting that inspection and test, which gives the results of the inspection and test and the date of the next inspection and test

supply a copy of that report to each existing tenant of the residential premises within 28 days of the inspection and test

supply a copy of that report to the local housing authority within 7 days of receiving a request in writing for it from that authority

retain a copy of that report until the next inspection and test is due and supply a copy to the person carrying out the next inspection and test

supply a copy of the most recent report to any new tenant of the specified tenancy to which the report relates before that tenant occupies those premises; and any prospective tenant within 28 days of receiving a request in writing for it from that prospective tenant

Action needed in the event of an Unsatisfactory Report:

Where an Electrical Installation Safety Report identifies urgent remedial work or requires ‘further investigation’, the private landlord must ensure that the required work is carried out by a qualified and competent person within 28 days (or the period specified in the report if it is less than 28 days), starting with the date of the inspection and testing.

Construction and Building Inspectors

Specialties within this occupation include: Electrical Inspectors; Elevator Inspectors; Home Inspectors; Mechanical Inspectors; Plumbing Inspectors; Public Works Inspectors; Specification Inspectors

What Would I Do?

Construction and Building Inspectors examine buildings, highways and streets, sewer and water systems, dams, bridges, and other structures. Inspectors ensure that construction, alterations, or repairs comply with building codes and ordinances, zoning regulations, and contract specifications. Inspectors make an initial inspection during the first phase of construction and follow up with additional inspections throughout the construction project. However, no inspection is exactly the same. In areas where certain types of severe weather or natural disasters—such as earthquakes—are more common, Inspectors monitor compliance with additional safety regulations designed to protect structures and occupants during those events.

Many Inspectors investigate construction or changes being done to buildings without proper permits. Inspectors advise violators to obtain permits and submit to inspection. Inspectors may testify in court against code violators. They check the status of construction inspection activities and keep track of permits issued. If needed, Inspectors act on their findings. If a problem is found and not corrected within a specified period of time, government Inspectors have the authority to send out a “stop-work” order. Although Inspectors spend considerable time inspecting construction worksites, they also spend time in field offices reviewing blueprints, answering letters or telephone calls, writing reports, and scheduling inspections.

Electrical Inspectors examine the installation of electrical systems and equipment to ensure that they function properly and comply with electrical codes and standards.

Elevator Inspectors examine lifting and conveying devices, such as elevators, escalators, moving sidewalks, lifts and hoists, inclined railways, ski lifts, and amusement rides.

Home Inspectors conduct inspections of newly built or previously owned homes, condominiums, townhomes, manufactured homes, apartments, and commercial buildings. Home inspection has become a standard practice in the home-purchasing process. Home Inspectors are most often hired by prospective home buyers to inspect and report on the condition of a home’s systems, components, and structure. Although Inspectors look for and report violations of building codes, they do not have the power to enforce compliance with the codes.

Mechanical Inspectors examine the installation of heating, ventilation, air-conditioning, and refrigeration systems and equipment to ensure they are installed and function properly. This may include the inspection of commercial kitchen equipment, gas-fired appliances, and boilers.

Plumbing Inspectors examine plumbing systems; water supply and distribution systems; plumbing fixture traps; and drainage, waste, and vent lines.

Public Works Inspectors ensure that construction of public water and sewer systems, highways, streets, bridges, and dams conform to detailed contract specifications.

Specification Inspectors are often employed by building owners to ensure that work is done according to design specifications. Specification Inspectors represent the owner’s interests, not those of the general public. Insurance companies and financial institutions also may use their services.

Inspectors may use such tools as air velocity and temperature monitors, circuit testers, force or torque sensors, levels, liquid leak detectors, measuring wheels for distance, pressure or vacuum recorders, carbon monoxide detectors, asphalt thermometers, infrared thermometer lasers, and concrete strength measurers.

Their use of technology includes a wide range of computer software, such as compliance, database, enterprise resource planning (ERP), map creation, procurement, spreadsheet, and word processing. Many Inspectors also use laptops or other portable electronic devices to help make their written reports more accurate.

Owner Project Requirements: Electrical System

Electrical Systems work is the new design and installation, alteration, or repair of any electric wires, wiring apparatus and other appliances used or to be used for the transmission of electricity for electric light, heat, power, signaling, communication, alarm and data transmission.

Installation and modification work may also include the necessary equipment, usually consisting of a circuit breaker(s), switch(es), fuse(s) and their accessories, connected to the load end of service conductors to a building or other structure, or an otherwise designated area, and intended to constitute the main control and cutoff of the supply.

Work you can do without a permit, Licensed Master Electrician or Registered Design Professional

No installation and modification to any electrical systems can be performed without a permit and a Licensed Master Electrician.

Work you can do without a permit

No installation and modification to any electrical systems can be performed without a permit.

When you need to hire a Licensed Master Electrician and obtain a permit

General and Minor Electrical Work, as outlined below, do not require a Registered Design Professional.

General Electrical Work. All electrical work, other than electrical installation of 1,000 KVA or larger, as outline in the scope of work, can be performed by a Licensed Master Electrician, with a permit and a required inspection performed by the DOB.

Minor Electrical Work. Replacement and repairs, listed below, requires a Licensed Master Electrician and an electrical permit, but does not require a DOB Inspection, for this type of work.

Tips On A Thorough Home Inspection And Home Testing

Home Inspections

A home inspection can be one of the most nerve-wracking experiences in the home buying process, regardless of whether you are the buyer or the seller. If you are the seller, you are concerned that some unknown issue could force you to drop the price, pay for repairs, or seek another buyer. As the buyer, you are worried that unforeseen issues may persuade you out of your new home or force you to conclude that it is not worth the asking price. Either way, it is important to know the truth about a home before a transaction takes place.

Buyers typically hire the home inspector as part of the mortgage loan process, but sellers sometimes ask for home inspections prior to putting a home on the market as a pre-emptive measure. Home inspections tend to cost anywhere between $200 and $500, so a pre-emptive inspection may well pay dividends in allowing you to fix problems before sale and/or ask for a higher price with confidence.

How do you choose a home inspector?

Your realtor may have a list of preferred inspectors, and friends and relatives may also have an opinion — but follow up on any suggestions. Check for professional affiliations such as membership in the National Association of Home Inspectors or similar organizations.

What should you expect during a home inspection?

The home inspector should conduct a thorough review of the complete physical structure of the house and its supporting systems — mechanical, electrical, plumbing, and HVAC (heating, ventilation, and air conditioning) systems. That includes inspections of attics, basements, crawl spaces, utility closets, and other areas that are infrequently accessed, so sellers must make sure that access to these areas is not obstructed. Exterior walkways, driveways, curbs, and similar features are also inspected.

Your inspector will be making an objective analysis of each of these systems, taking notes and providing comments if you are tagging along. Do not hinder the inspector in doing his or her job, but feel free to ask questions about issues that you do not understand.

Here are a few of the most common questions we get asked.

What is a home inspection?

A home inspection is a professional consulting service that determines the present condition of the home’s major systems, based on a visual inspection of accessible features. It focuses on the performance of the home, rather than cosmetic, code or design issues. Inspections are often performed during a real estate transaction but may be done anytime.

A home inspection is:

An in-field evaluation and professional opinion of the performance of the readily accessible installed systems in a home at one point in time

Primarily a visual examination

Intended to identify components that are significantly deficient, unsafe or near the end of their life

Documented in a written report

A home inspection is not:

An insurance policy, guarantee or warranty on the home

An invasive or destructive exercise

Intended to identify concealed defects

A code or design review

Intended to predict future performance or life expectancy

An environmental review or energy audit

Components included:

Roof

Structure

Exterior

Electrical system

Heating and Air Conditioning system

Plumbing system

Insulation and Air/Vapour Barriers

Interior

Mechanical and Natural Ventilation systems

What’s excluded:

Cosmetics

Code, bylaw and building regulation issues

Outbuildings

Swimming pools and spas

Specialty systems including telephone, cable TV, alarm systems

THE FINAL HOUSE CHECKLIST! THE ULTIMATE PRE-SETTLEMENT INSPECTION CHECKLIST

Your building and pest inspections went well. The sale is now unconditional. Before long you will be handed the keys to your new home!  What do you need to do as part of your final inspection?  Your final walkthrough on handover day is about making sure nothing that you and the seller have agreed upon has changed.  It’s time to make sure everything is working.  It’s time to make sure that there was no damage done as the seller moved out.  It’s time to make sure that tenants haven’t messed with your new home.

We’ve all heard the horror stories of sellers ripping out gardens, leaving garbage behind, packing up the pool pump…  What about building, electrical or plumbing problems?  Did your seller put a big old dent in the wall as he moved out?  Did the movers scratch up those beautiful floorboards?  The final inspection checklist is about making sure you’re getting everything you’re paying for!

USE A HOUSE SETTLEMENT CHECKLIST BEFORE THE BIG DAY

But before that day, it’s important to go through a house settlement checklist to ensure the home you’re receiving is the same home you inspected when you decided to make an offer. A final house inspection is an important part of the purchase process. While not an obligation, it is a right for the new owner to make a final inspection of the home before handover.

FINAL INSPECTION CHECKLIST

This house settlement checklist is a guide to ensure all the key areas of your property are checked – and double-checked – before handover. Some items on the checklist may not apply to every property, but the list gives you a good general idea of the many different aspects of a home that are worth inspecting before it’s too late.

These are the items you should thoroughly inspect on the final inspection day:

electrical switchboard

gas meter

telephone line

letter box

door bell

light fixtures including pendants

water taps and mixers (check outside for hose taps as well)

tap spouts

water filtration system

plugs for sinks and basins

laundry tub

washing machine taps

sinks (check that don’t leak)

toilets (check that flush)

door handles

window dressings

landscaping features (properly maintained)

shower rose and hand shower

exhaust fans

ceiling fans

stove / cooktop / oven

dishwasher

air conditioner

evaporative cooler

heating unit

hot water service

pool pump

spa

garage door (check that works + remote)

smoke detectors

rubbish bins (check that present and in good condition)

door locks

window locks

curtains

blinds

home telephone

any items that may have been governed as part of the sale including display furniture.

Home Inspection Checklist

Buying a dream home can be a very involved process that includes multiple steps and months of searching. The fun part includes working with an amazing real estate agent to explore popular neighborhoods and tour homes until you find “the one.” Once you locate your perfect property and make an offer that is then accepted, you’ll have to hire a home inspector.

Inspection requirements can vary from state to state, and the Standard Practice for Home Inspections from the American Society of Home Inspectors is exhaustive

Lot

Your home inspection report will also include an evaluation of the lot on which the home sits. An inspector will look for soggy areas in the yard and see if drainage flows away from the house.

Structural Components

In addition to the superficial components of a home, an inspector will assess the strength of the foundation and framing of the building.

Roof

When evaluating the condition of a roof, inspectors look at the entire system, including shingles, flashing, and skylights. They’ll identify weak spots, loose shingles, and signs of aging and decay, as well as note the overall condition and age of the roof.

Exterior

Before heading inside, an inspector will check out the rest of a home’s exterior. This includes siding, soffit, porches, balconies, walkways, railings and driveways. If anything needs repairs or repainting, it will be noted in the inspection report.

Interior and Attic

Inside the home, an inspection will detail the condition of the walls, ceilings, floors, windows, doors, stairs and railings. In the attic, inspectors will observe the structure of the roof and look for signs of leaks.

Electrical

The electrical system of a home is also inspected. Switches are tested, and malfunctions are noted. An inspector will check to see how the electric panel looks and if the outlets have been grounded.

Plumbing

All components of the plumbing system, including pipes, drains, water heaters, sump pumps, and sewer lines will also be evaluated.

Appliances

If appliances like the stove, dishwasher or refrigerator come with the home, they will be tested to make sure they function properly.

Heating and Cooling Systems

An inspector will also check the heating and cooling systems in the house to ensure they are in proper working order. If there is a furnace or fireplace, information about those features will also be covered.

Tips: Negotiating Repairs After a Home Inspection

Negotiating repairs after a home inspection doesn’t have to be difficult, especially when you follow these tips! When an offer is accepted on a home, it can be easy for both buyers and sellers to feel that they’re at the end of the finish line. Accepting an offer brings the deal much closer to the closing table, but there are several other important steps the transaction must go through before closing day. One of those steps is the home inspection and with the home inspection, major issues can arise.

A home inspection provides the buyer with a detailed report of the home’s structure, plumbing, electrical, foundation, roof etc. It helps the buyer know if certain repairs are needed so that they do not encounter costly problems after purchasing the home. Working through repairs on the home inspection shouldn’t be a battle, there should be a mutual understanding from both sides why a buyer is requesting certain repairs and why the seller may decline those repairs.

Determine What You’d Like the Seller to Repair

While every situation is different, the buyer or seller may split some – or all – of the repairs that appear on the inspection report. Other times, the buyer will be solely responsible, or the seller will be responsible. When reviewing the inspection report, determine which items you would prefer the seller repair. As a buyer, always try to come to the seller from a kind, courteous place. Hefty negotiations will most likely take place – which your realtor will handle for you. Your realtor should also help determine which repairs the seller should handle and which will be your responsibility.

Discuss What Repairs Are Most Important

Bear in mind that nearly all homes will have issues – no house is perfect. When reviewing the list, break it down into three sections: 1) major, glaring defects that will be extremely expensive to repair 2) issues that are not overly costly but also not cheap, and 3) small, minuscule items that are not of immediate importance.

Get a Quote for Repairs from a General Contractor

After receiving the inspection report, the buyer may feel inclined to ask the inspector for pricing estimates on how much the repairs will cost. In almost every situation, the inspector will be unable to provide an estimate. A contractor, on the other hand, can give some ballpark numbers. Your realtor may also be able to provide some estimates. Additionally, your realtor may be able to put you in contact with recommended contractors. Chances are if your Realtor has been in the real estate industry long enough, he/she has a general understanding of standard repair costs. After your realtor has put you in contact with a contractor, provide a list of the items you want them to complete and they should have an estimate on approximately how much everything will cost.

Simple Tips On How To Find A Tax Preparation

Ways Lying On Your Tax Return Can Get You Into Trouble With the IRS

Other than a guilty conscience, what can happen if you lie on your tax return to get a bigger refund or owe less? The consequences fall into six categories.

1. The IRS can identify discrepancies on your return and send you a notice.

This is the simplest and normally mildest IRS response.

As the IRS processes your return, the IRS will automatically check for mismatches between your return and information the IRS has on file about you. The IRS gets this information every year from your employers, banks, and other third parties.

The IRS will flag any mismatches and may send you a “CP2000 notice” proposing more taxes.

2. The IRS can audit you.

The IRS has a formula for picking out returns to audit.

The IRS is more likely to audit certain types of tax returns – and people who lie on their returns can create mismatches or leave other clues that could result in an audit.

Audits can be costly and long. Individual taxpayers owe, on average, $9,500 in additional taxes (not including penalties and interest) in an audit. And complicated audits can last more than a year.

Audits can also lead to other consequences, especially if the IRS thinks you intentionally lied on your return. Those can include civil penalties of up to 75% of the taxes you owe.

3. You can lose tax credits in future years.

If the IRS audits your return and determines that you incorrectly claimed the Earned Income Credit (EIC), two things can happen:

  • You’ll have to pay back the EIC portion of your refund.
  • You may not be able to claim the EIC for two years – and maybe even 10 years if the IRS thinks you fraudulently took the credit.

4. You’ll be paying for professional help.

Any time you’re dealing with an IRS audit, penalties, or other significant tax problems, you’re probably going to need the services of a qualified professional.

While this is often money well-spent and can lessen some of the other consequences, the fees can add up for more complicated issues. Be sure to use a reputable professional. For civil (non-criminal) matters, you normally won’t need an attorney.

In most cases, an enrolled agent or CPA familiar with tax problem-solving can handle the situation, saving you time, money, and stress in the long run.

5. You could face civil penalties.

Penalties will vary based on how much your understated your tax. If you made a simple error and the IRS adjusted it, you might not have to pay any penalty.

Bigger understatements mean bigger consequences. In this case, the most common penalties are:

  • Negligence penalty: 20% of the additional tax
  • Fraud penalty: 75% of the additional tax due to fraud

6. In rare cases, the IRS can press criminal charges.

When the IRS identifies fraud, the IRS can pursue civil or criminal charges.

The IRS prosecutes relatively few cases each year – and they usually involve large omissions of income, tax evasion or tax protest schemes, or lying to the IRS in an audit.

In 2016, the IRS prosecuted slightly more than 1,000 taxpayers for tax crimes. The IRS takes these cases seriously, with average jail times of over three years.

You can get audited

Because the IRS gets all of the 1099s and W-2s you receive, they know if you do not report all of your income. Even if you accept unreported payments in cash or check, your financial activity can reveal red flags about what income you do not report, potentially triggering an audit.

An IRS audit is an extensive review of your taxes and financial records to ensure you reported everything accurately. Though most people have a less than 1% chance of being audited, it’s not worth the risk.

Undergoing an audit is a time-intensive and costly process that involves providing years of documentation and even in-person interviews. If the IRS audits you, you can (and probably should) hire a professional to represent you and your interests. While that’s a smart idea, it can be a pricey, unexpected cost.

While the IRS may have only flagged one return for audit, they can review any return from the past six years. If they find more issues, they can add penalties and fines for every year they find problems. If you made tax mistakes for the past several years, you could end up owing thousands for taxes you misrepresented.

How can you get more on your tax return legally?

Nobody likes owing money to the IRS at the end of the year or getting a miserly refund. However, tax fraud is a serious crime. Glossing over your income, boosting your deductions or any other form of “fudging numbers” is lying on your tax return, and that’s tax fraud.

That doesn’t mean you’re stuck with owing or receiving less than you desire. There are a number of legal ways to get a bigger tax refund.

Even if none of those avenues are open to you, it’s still better to tell the truth. Saving yourself a little money at filing time can end up costing you thousands of dollars. It may even land you in jail.

Save yourself the headache and report your information accurately and on time. And, make sure you know what you need to do to avoid common mistakes made on taxes.

Tips to Help You Choose a Tax Preparer

Many people hire a professional when it’s time to file their tax return. If you pay someone to prepare your federal income tax return, the IRS urges you to choose that person wisely. Even if you don’t prepare your own return, you’re still legally responsible for what is on it.

Here are ten tips to keep in mind when choosing a tax preparer:

  • Check the preparer’s qualifications.  All paid tax preparers are required to have a Preparer Tax Identification Number or PTIN. In addition to making sure they have a PTIN, ask the preparer if they belong to a professional organization and attend continuing education classes.
  • Check the preparer’s history.  Check with the Better Business Bureau to see if the preparer has a questionable history. Check for disciplinary actions and for the status of their licenses. For certified public accountants, check with the state board of accountancy. For attorneys, check with the state bar association. For enrolled agents, check with the IRS Office of Enrollment.
  • Ask about service fees.  Avoid preparers who base their fee on a percentage of your refund or those who say they can get larger refunds than others can. Always make sure any refund due is sent to you or deposited into your bank account. Taxpayers should not deposit their refund into a preparer’s bank account.
  • Ask to e-file your return.  Make sure your preparer offers IRS e-file. Any paid preparer who prepares and files more than 10 returns for clients generally must file the returns electronically. IRS has safely processed more than 1.2 billion e-filed tax returns.
  • Make sure the preparer is available.  Make sure you’ll be able to contact the tax preparer after you file your return – even after the April 15 due date. This may be helpful in the event questions come up about your tax return.
  • Provide records and receipts.  Good preparers will ask to see your records and receipts. They’ll ask you questions to determine your total income, deductions, tax credits and other items. Do not use a preparer who is willing to e-file your return using your last pay stub instead of your Form W-2. This is against IRS e-file rules.
  • Never sign a blank return.  Don’t use a tax preparer that asks you to sign a blank tax form.
  • Review your return before signing.  Before you sign your tax return, review it and ask questions if something is not clear. Make sure you’re comfortable with the accuracy of the return before you sign it.

Things accounting students should know about becoming a tax preparer

Whether you’ve just declared your major or you’re months away from graduating, you have a host of strong career options as an accounting student. One career you should strongly consider is a professional tax preparer. Here’s what you should know.

Tax preparation can be a viable, profitable side hustle

Many students have the misconception that owning their own tax preparation business has to be a full-time venture. If your long-term goals include climbing the ranks at a public firm or one day landing a CFO position in a private industry, you may have never even considered tax preparation as an additional career path.

No matter your aspirations, professional tax preparation is flexible enough to be an additional source of income as you pursue your other career goals, making it an increasingly popular choice for millennials looking for a side hustle.

You don’t need to be a CPA to prepare taxes

Of course, not all accounting students plan to sit for the CPA exam. Even without a CPA license, an associate or bachelor’s degree in accounting will put you well on your way to becoming a qualified, knowledgeable tax professional.

You can further your career in tax preparation by pursuing other credentials like Enrolled Agent status or continuing education opportunities like the IRS Annual Filing Season Program.

You can start while you’re still in school

You can start making money as a professional tax preparer long before you have your accounting degree in hand.

To get started, you’ll need to apply for your PTIN (Preparer Tax Identification Number) and EFIN (Electronic Filing Identification Number) and register with your state. You can apply to work with established tax offices in your area or even opt to start your own practice immediately. While starting out on your own may be more challenging at first, you’ll have the foundation of a business that you can carry with you throughout college or the entirety of your career.

Improve Your Vision With These Effective Eye Care Tips

Types of Vision Loss

There are broad spectrums of eye conditions which can lead to vision impairment, many resulting in blindness and permanent vision loss. This page describes some of the common types of vision loss and outlines the definition of vision impairment.

Definition of vision loss

Vision impairment is defined as the limitation of actions and functions of the visual system, which places the individual in a position which inhibits their ability to function in the standard manner to that of other human beings.

The U.S. National Eye Institute defines low vision as “a visual impairment not correctable by standard glasses, contact lenses, medication or surgery that interferes with the ability to perform activities of daily living.”

Types of vision loss

According to the the World Health Organization:

  • Visual acuity is the measure of how well the eyes can see objects from a set distance.
  • For example, 6/60 describes the ability to see objects only at a distance of six metres, while a normal eye can see the same object at 60 metres.
  • Normal visual acuity is 6/6 (20/20 in the imperial measure of feet).
  • The World Health Organization defines blindness as a visual acuity of less than 3/60 (or equivalent).

Types of Vision

Accommodation is the process by which the human eye changes optical power to maintain a clear focus on an object

  • This is mediated by ciliary muscles, which contract to change the aperture of the lens (and thus adjust focal distance)
  • Normally, the light from an object will be focused on the centre of the retina (at the fovea) in a healthy person
  • However some individuals may be short / near-sighted (myopic) or long / far-sighted (hyperopic)

Short Sightedness

  • Light is focused in front of the retina, causing distant objects to appear blurry (close objects still appear focused)
  • Commonly develops with age (the ciliary muscles start to lose tensile strength, resulting in the widening of the lens)
  • Most common corrective measure is the use of concave lenses to refocus the incoming light

Long Sightedness

  • Light is focused on a point behind the retina, causing nearby objects to appear blurry (distant objects still appear focused)
  • It is a type of refractive error caused by imperfections in the eye (e.g. the eyeball may be too short)
  • Most common corrective measure is the use of convex lenses to refocus the incoming light

Three Common Vision Problems

Most people who start needing glasses or contacts while they’re young have at least one of three common vision problems: myopia, hyperopia, and astigmatism.

These are all refractive errors, which means they’re problems with the way the eyes focus light, rather than an eye disease. Refractive errors have to do with the physical shape of our eyes, so let’s take a closer look!

Myopia: What’s Right In Front Of You

Myopia is the technical term for nearsightedness, meaning that you can see clearly up close but distant objects are blurred. This happens when the eyeball itself is too long, or else when the cornea (the clear front part of the eye) is too curved. That additional curvature or length causes light to focus in front of the retina instead of on it, which makes the resulting images look fuzzy.

The way glasses or contacts correct myopia is by compensating for this error to extend the light’s focus onto the retina where it belongs. These lenses are concave (thinner in the middle), and always have a negative prescription.

Hyperopia: Gazing Into The Distance

Hyperopia, better known as farsightedness, means that you can see distant objects clearly, but everything up close is blurry. Hyperopia happens for the opposite reasons that myopia does. Instead of being too long, the eyeball is too short, or else the cornea is too flat. This causes light to focus behind the retina, making near images fuzzy.

In order to correct hyperopia, corrective lenses must be convex (thicker in the middle) and have a positive prescription. The larger the number, the stronger the prescription.

Astigmatism: A Warped Perspective

The third common refractive error people experience is astigmatism, and it’s a little different from the other two. A normal cornea is uniformly curved so that there is a single focal point. A cornea with astigmatism is more football shaped, creating multiple focal points, which makes things appear blurry at any distance and bends their images.

Astigmatism is often paired with one of the other refractive errors, and it requires more complex lenses to correct than they do. Typically, the lens will be somewhat cylindrical rather than spherical.

Common Eye Conditions

  • Age-related Macular Degeneration (AMD) is a degenerative condition affecting central vision. Reading and crossing roads safely may be difficult. Early detection can slow down progression of the disease and improve treatment outcomes.
  • Cataract is a clouding of the lens, resulting in blurry vision and faded colours. This leads to glare-sensitivity and increases the risk of trips and falls. Cataracts are usually safely treated by surgery. A cataract is a cloudiness that forms in the lens of the eye – the part that allows a focused image to be transmitted onto the retina. This cloudiness creates blurring, affecting both near and distance vision. Cataracts generally result from the ageing process, though they can also develop from other causes such as congenital disability (from birth) or trauma to the eye. Cataracts due to ageing usually develop slowly and affect both eyes at different rates.
  • Glaucoma is an eye disease that damages the fine nerves connecting the eye to the brain. Glaucoma can result in tunnel vision and even total blindness. Early detection is vital.
  • Diabetic Retinopathy is caused by diabetes and result in increasingly blurred, patchy and fluctuating vision. Regular eye checks are crucial to reducing acuity.
  • Neurological Vision Impairment (NVI) can result from an acquired brain injury. Glasses may not improve vision. Homonymous Hemanopia is a common type of NVI.

These conditions can involve loss of central vision or side vision or indeed the whole field of vision. Sometimes people can see both in front and to the sides but their vision is blurry. Other people may see well in daylight but experience great difficulty indoors or at night.

It is important to understand that different people are affected in different ways by their changing vision. Vision impairment can have an impact on a person’s functioning in their home, workplace, school, and so on.

No matter what the vision impairment, there are a range of services and mobility aids that can provide assistance for someone that has problems getting around safely and independently.

  • Guide Dogs provide advice and training in orientation and mobility, enabling people with vision impairment to move around safely and confidently. As well as guide dogs, their broad range of mobility services includes training with mobility aids such as canes, low vision aids or electronic devices.

Symptoms of Cataracts

Could you have cataracts?

You use the lens of your eye every day, for everything from reading to driving to bird watching. With age, the proteins inside your lens can clump together turning the lens from clear to cloudy. Certain behaviors can put you at a higher risk for getting a cataract. These include:

  • Too much time in the sun without eye protection
  • Smoking
  • High blood sugar
  • Using steroid medications
  • Exposure to radiation

But you aren’t alone. Over 20 million Americans over the age of 40 have cataractsTrusted Source in one or both eyes, and 6 million have had corrective surgery. If you have any of the following symptoms, talk to your eye doctor soon.

Cloudy days

Cataracts start small and initially may have little effect on your vision. Things might seem a little blurry — like looking at an impressionist painting. This effect usually increases over time. The world will seem cloudy, blurry, or dim.

There are three main types of cataracts, affecting different parts of the lens:

  • Posterior subcapsular cataracts
  • Nuclear cataracts in the center of the lens
  • Cortical cataracts on the side of the lens, which appear as small streaks

Those with nuclear cataracts may briefly see their vision improve. This sensation is sometimes called “second sight.”

No more wild nights

As cataracts become more advanced, they begin to darken with a yellow or brown tinge.

This begins to affect night vision and makes certain nighttime activities, such as driving, more difficult. In fact, a study from Curtin University in Australia found that treating cataracts reduced the risk of car accidents by 13 percent.

If you suspect you have cataracts, be very careful at night and don’t drive when your vision is compromised.

Get Bat Out Of The House

How to Get Rid of Bats

Bats are mysterious and mythical mammals because they are the only ones in their genus that can fly. Anyone who has these winged creatures hanging around their property wants to know how to get rid of bats.

Some people are even scared of these mammals — but they’re not as dangerous as imagined. That said, it is still important to know how to get rid of bats from home or anywhere they are not welcome. The problem with bats is that they bite when provoked or threatened and carry the risk of transmitting rabies.

Bats are also noisy and may also soil wherever they stay. Nevertheless, these mammals are vital to the ecosystem because they feed on many pests including deadly mosquitoes. Bats can wreak havoc if they choose to nest in your attic or home. And in many places, there are laws preventing the killing (or even the forceful removal) of bats

Signs of Bats in Your House

Let’s get the scary part out of the way — There likely won’t be many signs you have bats. Do bats make noise? — Yes, but not any that you can hear. Their noises are at a higher octave than most humans here. There may be the occasional click, but it’s not loud.

So, you’re going to have to search for the any signs of bat activity in your home.

Check for:

Bats in Chimney: It’s easy for them to access, oftentimes warm and remains dark all day. This means chimneys are an ideal place for bats to…hang out.

Bats Under Eaves: Check for bats under the eaves of your home during the day, especially in parts where the sun doesn’t hit very well.

Bats in the Attic: Of course, the attic or upper crawlspace is a great hiding place for these winged invaders.

Outbuildings (Bats in Barns, or the Belfry): If you have a property with multiple buildings, you could find bats in your sheds, barns and detached garages — especially if you don’t frequent them.

How to Get Rid of Bats Forever – Complete Guide to Bat Control

Though there are over 1200 different species of bats in the world, there are only three major types that tend to inhabit the home. Bats are one of the most feared household pests, simply because of their appearance, although constant exposure to bat droppings have been proven to cause certain health related issues such as lung disease.

The major concern upon discovering a bat inside the home however, is normally linked to a number of myths that are often taken at face value by many people. People often believe that bats are associated with folklore and witchcraft, mainly because of their nocturnal lifestyle, and these myths have only caused much hysteria when a bat infestation in the home is discovered. The best way to get rid of bats on a long term basis is by understanding their habits and lifestyles. In the notes below, we delve into a deeper understanding of the way bats operate, and how to keep them out for good.

What are bats?

Like many other creatures including humans, bats are warm blooded mammals that contribute to the ecosystem of life. They are important to the environment as they aid in pollinating flowers and scattering seeds, thereby contributing to the wildlife of many tropical plants and herbs.They are the only mammals that have mastered flight, which can be attributed to their wide wings that contain similar bones to those present in the hand and arms of a human. Bats are generally divided into two major groups because of their size and characteristics, these are the megabats and the microbats. Though the difference mainly lies in size, the megabats are known for their generally peaceful existence, living by eating fruits, while the microbats appear a bit more sinister and are known for their echolocating capabilities.

Understanding megabats

Also commonly referred to as “fruit bats,” megabats are generally found in tropical countries and islands and are generally very large. There are a few that are the same size as microbats, standing at only 6 cm (2.4 in.), but the majority of megabats are very big, with the largest recorded bat weighing a shocking 3.5 pounds, with a wingspan of  5.6 feet. Megabats are generally herbivores that rely only on plants, and operate based on their sense of smell, instead of echolocation. These bats also have very large eyes, making it easier for them to align themselves inside caves, as well as during twilight.

Understanding microbats

Also dubbed as “true bats” because of their ability to communicate via echolocation, microbats are the more popular of the two, and can be found in many different countries worldwide. They are generally very small, with sizes varying from 4 to 16 cm (1.6 to 6.3 inches) and carry a variety of characteristics that make them different from their larger counterparts. Microbats are also known to be “vampire bats” as well, because some of their specie feeds on blood. Most microbats however have a diet of insects, sometimes frogs and even fish. While one of the major distinctions of microbats is their ability to echolocate, they also contain certain physical traits that makes them distinctly different. Examples of this include the difference in the size of the ear and eyes, as microbats tend to have larger ears than megabats, and smaller eyes. Ultimately, both microbats and megabats are crucial to the ecosystem of the world, but understanding them helps when getting rid of them.

How to Get Rid of Bats: Everything You Need to Know to Protect Your House

If you want to know how to get rid of bats in attic or near the house, you’ve come to the right place. Non-stop fighting with pests is not only my job, it has also been my hobby for many years. I receive numerous calls from clients who are desperate to get rid of bats but don’t know how to do that.

These flying mammals are dangerous neighbors, and once you notice their presence in your yard or under your roof, you have to take care of this problem immediately. Now, let’s discuss who they are and how to get rid of bats outside your house and inside it.

Detailed Guide on Bats

Nobody, except Batman probably, thinks that living in a house full of bats is cool. So, if this happens to you, there are several options to remove bats from attic, including DIY measures and calling the pest control service. The most dangerous thing about bats is that they can bite you and spread various health hazards through it.

Bats’ Characteristics

Bats are mammals, just like us. They belong to the Chiroptera class and are unique by their ability to fly, which makes them the only one representative of mammals who can do that. Not all bats are similar: there are over 900 types of them.

Bats have arms, which are long, and fingers. There are membranes that connect these fingers and wings with their legs. Usually, bats do not live in cold climates. They prefer to fly during the night and hide from sunlight somewhere in dark places, including attics and caves. So, you’re most likely to find bats in a barn. Bats are a valuable part of nature, and they are useful for humans as well.

A Quick and Easy Guide on How to Get Rid of Bats

Bats are flying mammals in the order Chiroptera (pronounced /kaɪˈrɒptərə/). The forelimbs of bats are webbed and developed as wings, making them the only mammals naturally capable of true and sustained flight. By contrast, other mammals said to fly, such as flying squirrels, gliding possums and colugos, glide rather than fly, and can only glide for short distances

Bats do not flap their entire forelimbs, as birds do, but instead flap their spread out digits, which are very long and covered with a thin membrane or patagium. Chiroptera comes from two Greek words, cheir (χείρ) “hand” and pteron (πτερόν) “wing.”

There are about 1,240 bat species worldwide, which represent about twenty percent of all classified mammal species. About seventy percent of bats are insectivores. Most of the rest are frugivores, or fruit eaters. A few species such as the Fish-eating Bat feed from animals other than insects, with the vampire bats being the only mammalian parasite species

Bats are present throughout most of the world and perform vital ecological roles such as pollinating flowers and dispersing fruit seeds. Many tropical plant species depend entirely on bats for the distribution of their seeds.

The smallest bat is the Kitti’s Hog-nosed Bat, measuring 29–34 mm (1.14–1.34 in) in length, 15 cm (5.91 in) across the wings and 2–2.6 g (0.07–0.09 oz) in mass. It is also arguably the smallest extant species of mammal, with the Etruscan shrew being the other contender.[citation needed] The largest species of bat is the Giant Golden-crowned Flying-fox, which is 336–343 mm (13.23–13.50 in) long, has a wingspan of 1.5 m (4 ft 11 in) and weighs approximately 1.1–1.2 kg (2–3 lb).

How to Get Rid of Bats and Save Your Sanity

It’s never a good feeling to have an unwanted critter under your roof. Looking for tips on how to get rid of snakes, how to get rid of house flies, or how to get rid of roaches can leave you feeling unsettled and with a serious case of the heebie-jeebies. There’s no mistaking that scratching sound coming from the attic that alerts you to an intruder, and it’s best to act quickly to get rid of the problem before it gets worse.

If you discover you’re sharing your home with bats, there are a few important things to keep in mind before getting them out of your house. Several species of bats are protected by the federal Endangered Species Act of 1973, which means it is unlawful to kill them. But that doesn’t mean you have to welcome them into your home! Also, bats are very valuable to the environment. They act as pollinators and seed spreaders and eat thousands of pesky bugs like mosquitoes in a single day, so we want to keep them around, but not under our roof. Bats can carry diseases like rabies, and their droppings, called guano, can cause respiratory problems for the home’s human inhabitants. So how do you get rid of bats without killing them?

Try a Bat Removal Device or Repellent

A bat excluder works great if you know where the bats are getting in. The cone- or tube-shaped device covers the hole and simply creates a one-way route for the bats to exit your home. When they leave at night, they won’t be able to get back in. Problem solved!

Of course, because bats can fit through tiny spaces, it’s not always easy to find out how they’re getting in. If that’s the case, try installing a bat alarm that emits a sound that’s unpleasant to bats and causes them to flee the area. Or try a product like Bat Magic. Bat Magic comes in tea bag-like scent packs and contains peppermint and spearmint oils.

Seal Up Any Holes

Once you’re sure the bats have left the building, it’s time to seal up any holes or cracks with caulk. Remember, bats can fit through holes as small as 1/2 inch, so you’ll have to be diligent to ensure your winged friends don’t return.

Truck Tires Benefits Of Temperature & Pressure Monitoring

What is the Difference Between SUV Tires and Truck Tires?

Learn about the differences between SUV tires and truck tires.

Once you know how to choose a SUV tire, you’re probably wondering about the difference between SUV tires and truck tires. While it may seem like a gray area, you’ll be surprised there are quite a few differences between the two (and tires for other vehicles). When you’re shopping for tires online, you’ll find a lot of websites compare light truck and passenger tires, but not SUV tires and truck tires.

SUV Tires vs. Truck Tires

What is the Difference Between SUV Tires and Truck Tires?

Truck tires are generally more aggressive, have a taller sidewall, and are rated to carry heavier loads than SUV tires. With that being said, a lot of truck tires are offered in SUV sizes, and the line that divides truck tires from SUV tires in terms of tire size is pretty blurry. Some SUVs use a “truck size” tire, and some newer trucks take tires that are more commonly an SUV size.

The main difference between a SUV tire and a truck tire is the style of the tire and what its primary benefits are. For example, the Cooper Discoverer CTS is marketed as a long-lasting tire with a comfortable, quiet ride. Compare that to the Discoverer HT or AT3, which are marketed for their traction.

Light Truck Tires vs. Passenger Truck Tires

You’ll also want to know the difference between light truck (LT) tires and passenger truck tires. SUVs almost never take an LT size, but trucks can take both. LT tires can handle a heavier load than passenger tires. Light truck tires are typically more durable, because they’re made with a thicker rubber compound than other tires. However, they usually cost more than passenger truck tires.

Passenger truck tires can provide a smoother ride than LT tires. They’re also less expensive, and are easier to find. However, they don’t have the ability to carry heavy loads. If you want to do any towing with your truck, you’ll want LT tires. Passenger tires also have thinner sidewalls, making them less durable than LT tires.

Choosing the Right Tires for Your Lifted Truck or Lifted Jeep

When looking for the right tires to fit your lifted truck, there are many choices out there that offer the proper traction needed. Doing the proper research can help you choose the brand name and terrain type you may want in a tire. The tires come in many different standard and metric sizes. Make sure you check the size lift you have on your truck, so you know the dimension of tire needed, and you don’t get tires to big or small.

Light Duty Tires

These tires are typically like passenger car tires with a larger load capacity, enabling them to be used on trucks. Light truck tires offer a very smooth ride, with tread design that is made to push away water when it rains, and offer higher mileage tread wear.

All Terrain Tires

Tires in this class offer the best of both worlds when looking to add them to your lifted truck. The tires have a slightly more aggressive tread pattern and depth compared to light duty truck tires. This enables the tires to conquer off road scenarios where the driver might end up in the dirt, mud, and sand. The tires will give your lifted truck an edge whether off the beaten path or back on the highway. The ride is smoother than a mud tire but still has a rougher ride quality.

Mud Terrain Tires

Mud tires are chosen more than any other class tire when people are considering to add that aggressive look to their lifted truck. The tread pattern on these tires are a lot deeper, and have huge lugs of rubber for pushing through the mud and water. The gaps in the tread allow mud to clean out, so if your lifted truck is deep in the mud, you can drive through without the mud caking on the tires. The good always has some bad as tread wear is typically a lot worse, and these tires have increased road noise because of the tread pattern.

As you can see, choosing the right tire for your lifted truck can be quite a decision maker. With all the tire manufactures out there and different lift kits available for your ride, doing the proper research to find out what type of tire you need is valuable. Always think about what type of driving you may do, if you are the avid outdoors man you may want to invest in an all-terrain tire or mud tire, because you will likely traverse through areas you will need the extra deep tread. If you plan on staying on the highway, then a light duty truck tire could be in your future. Whatever tire you choose for your lifted truck, just know they are out there and ready to be mounted to your new ride.

Winter Driving in a Truck

With snow, sleet and ice, the roads in winter can be dangerous. Winter driving mistakes can be made. Some tips to help you navigate your way home safely in your truck:

  • Brake and accelerate slowly.
  • Keep a firm grip on the steering wheel.
  • Give yourself extra space between vehicles.
  • If you hit ice, turn the wheel the direction you’re sliding.

Remember, when roads are icy or snowed-over, you can’t maneuver as if it’s a dry, sunny day. Be cautious and aware of what’s around you, including other drivers.